Using a CCS to CHAdeMO adapter for the first time is not difficult, but the first charging session is the one where the correct order matters most.
This guide is written specifically for the Longood CCS to CHAdeMO adapter sold by Autonlaturit.com. Other adapters may work differently, so always follow the instructions for your own adapter model.
The short version is simple: charge the adapter’s internal battery, connect the adapter firmly to the car first, connect the CCS cable to the adapter, start the charging session at the station, then turn on the adapter by pressing and holding the ON/OFF button for three seconds.
If everything is connected correctly, the adapter LED will change from blinking to steadily lit when fast charging starts.
Ready for your first CCS charging session?
A CCS to CHAdeMO adapter is not just a plug converter. It contains electronics that allow a CCS fast charger and a CHAdeMO vehicle to communicate with each other.
During the first charging session, most problems are usually caused by small practical issues:
- the adapter is not fully seated in the CHAdeMO inlet
- the CCS plug is not fully locked into the adapter
- the charging station session is started too early or too late
- the adapter’s internal battery is low
- the car is not in the right state for fast charging
- the charging station times out during the handshake
A checklist helps you avoid these simple problems before assuming something is wrong with the adapter, the car or the charger.
Before your first charge: read the manual
Before using the Longood CCS to CHAdeMO adapter for the first time, read the full user manual.
The quick-start guide is useful at the charger, but the full manual explains the adapter’s internal battery, correct connection order, troubleshooting, firmware updates, safety precautions and disconnecting procedure.
This is high-voltage DC fast-charging equipment. It should be handled calmly and carefully, especially during the first use.
Charge the adapter’s internal battery first
The Longood adapter has an internal battery. This battery powers the controller electronics that manage communication between the CCS charger and the CHAdeMO vehicle.
The adapter usually arrives partly charged from the factory, but it is still recommended to fully charge it before first use.
You can charge the internal battery with USB-C. Use the supplied USB-C multi-cable or another suitable USB-C cable connected to a 5V USB power source, such as a USB wall charger or power bank.
During USB-C charging, the red LED should blink. A full charge can take around 10 hours.
For the first charging session, do not skip this step. A low internal battery can make the adapter look like it is not working, even when the real issue is simply that it does not have enough power to start correctly.
Bring a USB-C backup power source
For everyday use, the adapter can charge its internal battery automatically while fast charging is in progress. But for the first test, it is smart to bring a backup power source.
Bring at least one of these:
- a USB-C cable
- a power bank
- a 12V vehicle socket USB adapter
- a cable long enough to reach from the car or power bank to the adapter
This is especially useful if the adapter has been stored for a long time or if the first charging attempt happens during a trip.
If you drive a Nissan Leaf, remember that the car’s 12V outlet may require accessory power. In many Leafs, you can activate the 12V outlet with a single press of the START button. Do not press twice if that turns on the dashboard and electronics fully. For many Leaf models, the car should be off when starting a fast-charging session.
Choose an easy charger for the first test
Do not make your first CCS to CHAdeMO charging session during a stressful road trip if you can avoid it.
Choose a nearby CCS fast charger that is easy to access, not too busy, and has another charger nearby if possible. A familiar charging location is better than a remote motorway stop.
For the first test, the goal is not to find the fastest possible charger. The goal is to confirm that your car, adapter and charging process work correctly together.
A good first test charger has:
- enough space around the car
- a CCS cable that can reach without tension
- clear instructions on the screen or app
- good mobile reception if app activation is needed
- another charging option nearby if the first unit is unavailable
Plan a backup charging option
Even with a well-tested adapter, a charging station can be out of order, occupied, offline or restricted.
For your first test, this is not a big problem if you are close to home. For a road trip, it can become stressful.
Before relying on the adapter for a long journey, test it near home and plan backup charging stops along your route.
This is normal EV trip planning, not a weakness of the adapter. Public fast chargers are complex systems, and a backup plan is useful for all EV drivers.
Check the adapter before connecting
Before you connect anything, take a moment to inspect the adapter.
Check that:
- the adapter has no visible damage
- the CHAdeMO side is clean
- the CCS inlet is clean
- there is no water, dirt, ice or debris inside the connectors
- the release buttons move normally
- the CCS cable from the charger is not damaged
- the charging cable can reach without pulling on the adapter
Do not use the adapter if it has visible damage or if it has been dropped hard enough that the internal electronics may have been affected.
If the charging station operator clearly prohibits the use of adapters, do not use the adapter at that station.
Park so the cable is not under tension
Before connecting the adapter, park carefully.
The CCS charging cable should reach the adapter comfortably. It should not pull down on the adapter, twist the connector, or put stress on the vehicle’s CHAdeMO socket.
This is easy to overlook during the first charge. Many CCS charging cables are heavy, stiff or short. If the cable is under tension, reposition the car before starting the session.
A calm setup is much better than trying to force the cable to reach.
Step 1: Insert the adapter into the CHAdeMO inlet
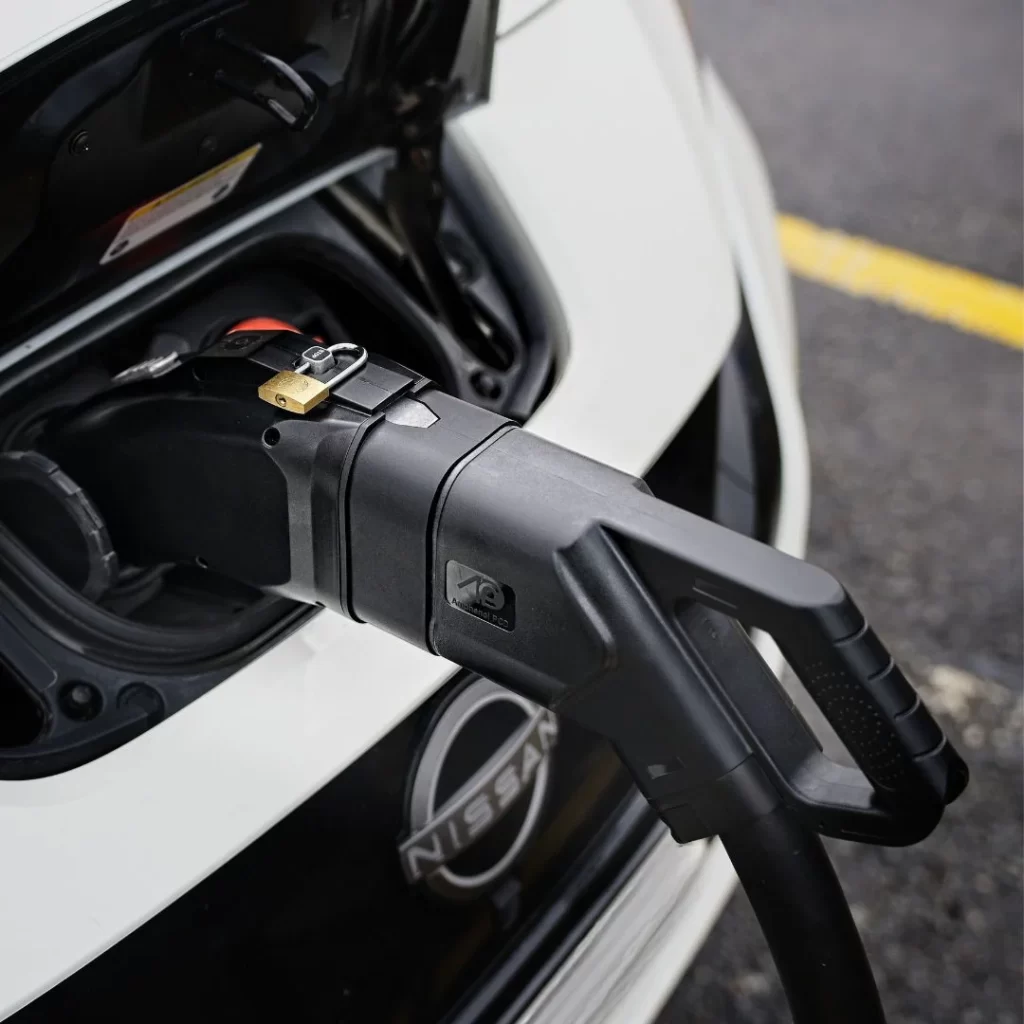
Start by inserting the Longood adapter into your vehicle’s CHAdeMO inlet.
Push it firmly into place until it clicks.
Do not rush this step. A poor connection on the vehicle side is one of the most common reasons charging does not start.
After inserting it, gently check that it is properly seated. It should not feel loose or half-connected.
On some vehicles, including many Nissan Leaf models, the car should be switched off before starting the fast-charging process. Follow the behaviour required by your own vehicle.
Step 2: Insert the CCS plug into the adapter
Next, take the CCS plug from the fast charger and insert it into the adapter’s CCS inlet.
Make sure it locks securely.
Again, do not force it. Align it properly and make sure the cable is not pulling sideways or downward on the adapter.
At this point, both sides should be connected:
- adapter locked into the car’s CHAdeMO inlet
- CCS charging cable locked into the adapter
Step 3: Start the charging session at the fast charger
Now follow the charging station’s normal activation process.
Depending on the operator, this may mean using:
- a charging app
- an RFID card
- a payment terminal
- a QR code
- the charger’s own screen
Start the fast-charging session as instructed by the station.
Different charging networks behave slightly differently. Some stations start communication quickly after payment or app activation, while others take longer.
Step 4: Turn on the adapter
As soon as you have initiated the charging session, press and hold the adapter’s ON/OFF button for three seconds.
The adapter LED should start blinking red.
When the charging session starts successfully, the LED should remain steadily lit.
This LED behaviour is one of the easiest ways to understand what is happening:
- blinking red: the adapter is trying to start or communicate
- steady red: fast charging has started successfully
- LED goes out or never lights: the session may have failed, or the internal battery may be low
During the first charge, stay next to the car until you see that charging has actually started.
Step 5: Watch the first minute
Once charging starts, watch the charger and the car for the first minute.
Check that:
- the charger shows active charging
- the car indicates that it is charging
- the adapter LED remains steadily lit
- the cable is not under tension
- there are no error messages on the charger screen or in the app
After the first minute, the session is usually stable. You can then continue as you normally would during a DC fast-charging stop.
What if charging does not start?
If charging does not start, stay calm. A failed first attempt does not automatically mean the adapter is defective.
First, check the simple things.
Make sure the adapter is fully inserted into the CHAdeMO inlet. Make sure the CCS plug is properly inserted into the adapter. Check the charger screen or app for an error message. Check that the adapter LED lights up when you try to start the session.
If the red LED does not light at all, the adapter’s internal battery may be depleted. Connect the adapter to a USB-C power source and allow it to receive some charge before trying again.
If the LED blinks but charging does not start, the charger and adapter may have timed out during the handshake. Disconnect everything, wait a moment, and try again.
Try the connection process again
If the first attempt fails, disconnect and repeat the process carefully.
The normal Longood connection order is:
- Insert the adapter into the vehicle’s CHAdeMO inlet.
- Insert the CCS plug into the adapter.
- Start the charging process at the fast charger.
- Press and hold the adapter ON/OFF button for three seconds.
This is the most common procedure and should work in most situations.
Some charging stations may behave better with a slightly different timing. For example, you may need to turn on the adapter just before starting the charging session, or start the station first and then turn on the adapter immediately afterwards.
The goal is to avoid the charger timing out before the adapter, car and station have completed their communication.
Check the vehicle state of charge
If your car battery is already close to full, the fast charger may refuse to start or may stop quickly.
This can happen if the car has a charge limit set, such as 80% or 90%, or if the station does not support fast charging above a certain state of charge.
For a first test, it is better to arrive with a battery level that gives the car a reason to fast charge. A very high state of charge is not ideal for testing.
Try another charging pedestal if available
If one charging unit does not start, try another pedestal at the same site if available.
Sometimes one charger has a temporary fault while another unit works normally. The issue may be the station, not the car or adapter.
Take note of any error messages shown by the charger. A message such as “communication error” can help support understand what happened if the issue repeats.
Do not disconnect under load
Do not try to remove the adapter during fast charging.
Always stop the charging session first using the charging station, app, payment system or vehicle system. Wait until charging has ended and the adapter LED has turned off.
Only then should you disconnect the CCS plug and remove the adapter from the car.
This is an important safety step.
How to end the first charging session
When the battery has reached your desired charge level, end the session according to the charger’s instructions or through your vehicle’s charging system.
After charging ends, the adapter LED should turn off.
Then disconnect in this order:
- Press and hold the adapter’s CCS release button while gently pulling out the CCS plug.
- Remove the CCS plug from the adapter.
- Press the CHAdeMO release button.
- Remove the adapter from the vehicle’s CHAdeMO inlet.
Do not pull on the cable. Use the release buttons and remove the connectors calmly.
After the first charge: check what you learned
After the first successful charge, make a few notes.
It is useful to remember:
- which charging network you used
- which charger model or brand it was, if visible
- whether the session started on the first attempt
- which connection timing worked best
- the starting battery percentage
- the charging power you saw
- whether the adapter battery seemed ready
This information helps you plan future charging stops with more confidence.
If the first charger worked well, you now have a useful reference point. If another charger later fails, you know the adapter and car can work together, and the issue may be station-specific.
When should you contact support?
Contact Autonlaturit.com support if the adapter repeatedly fails to start charging, especially if the same problem happens at multiple CCS chargers.
Before contacting support, collect useful details:
- your vehicle model and battery size
- the charging station operator
- the charger location
- the charger brand or model, if visible
- the error message on the charger screen or app
- whether the adapter LED blinked, stayed on or went out
- the order in which you connected and started the session
- photos of the charger and error message, if possible
This information makes troubleshooting much faster.
If a specific charging station is not compatible, logs and firmware information may help identify the issue and support future improvements.
First charge checklist
Before you leave home:
- Read the user manual.
- Fully charge the adapter’s internal battery.
- Bring a USB-C cable or power bank.
- Check that you have any charging apps, RFID cards or payment methods needed.
- Choose an easy first test charger.
- Plan a backup charger.
At the charger:
- Park so the CCS cable reaches comfortably.
- Check that the adapter and plugs are clean and undamaged.
- Turn off the car if your vehicle requires it.
- Insert the adapter into the CHAdeMO inlet until it clicks.
- Insert the CCS plug into the adapter until it locks.
- Start the charging session at the fast charger.
- Press and hold the adapter ON/OFF button for three seconds.
- Wait for the LED to become steadily lit.
- Watch the first minute of charging.
If charging fails:
- Check both physical connections.
- Check the charger screen or app.
- Make sure the adapter battery is not depleted.
- Disconnect and retry calmly.
- Try another charging pedestal if available.
- Note the error message if the issue repeats.
When charging is finished:
- Stop the session at the charger, app or vehicle.
- Wait until charging has ended and the LED is off.
- Remove the CCS plug from the adapter first.
- Remove the adapter from the car last.
- Store the adapter safely.
What should you expect from the first charge?
Your first charge should be treated as a practical test.
You are checking that:
- your car is compatible
- the adapter is charged
- the connection order is clear
- the CCS charger starts correctly
- you understand the LED behaviour
- you know how to stop and disconnect safely
Once you have done it once, the process becomes much more familiar.
For most drivers, the first successful charge is the moment the adapter starts to make sense. A CHAdeMO car that previously depended on older CHAdeMO fast chargers can suddenly use many modern CCS charging locations.
Bottom line
The first charge with a CCS to CHAdeMO adapter is mostly about preparation and correct order.
For the Longood adapter sold by Autonlaturit.com, the key steps are simple: charge the internal battery, connect the adapter to the car first, connect the CCS plug to the adapter, start the charger session, then press and hold the adapter’s ON/OFF button for three seconds.
Watch the LED, stay near the car during the first minute, and do not disconnect anything until the charging session has ended.
Test the adapter near home before relying on it for a long trip. Once you understand the process, the Longood CCS to CHAdeMO adapter can make a compatible CHAdeMO vehicle much more practical in Europe’s CCS-focused fast-charging network.